[리액트 네이티브] 채팅 애플리케이션 만들기 1.파이어베이스 세팅, 로그인, 회원가입
💡구현 목표
- 로그인/회원가입 : 이메일, 비밀번호를 이용한 로그인 및 회원가입
- 프로필 : 내 정보 확인 및 변경
- 채널 생성, 목록 조회
- 채널 : 실시간으로 메시지를 주고받는 독립된 공간
1. 프로젝트 준비
프로젝트 생성
expo init react-native-simple-chat //프로젝트 생성
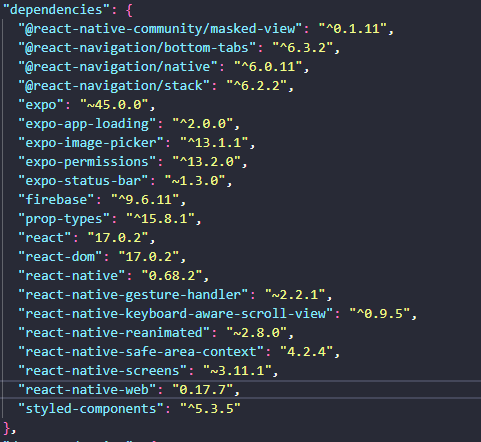
npm install @react-navigation/native //리액트 내비게이션 설치설치한 라이브러리
expo-image-picker : 기기 사진, 영상을 가져오는 기능
moment : 시간을 다양한 형태로 변경하는 등 시간과 관련된 많은 기능 제공
react-native-keyboard-aware-scroll-view : 키보드가 화면을 가리며 생기는 불편함 해결
react-native-gifted-chat : 메시지를 주고받는 채팅 화면을 구현할 수 있도록 돕는 라이브러리
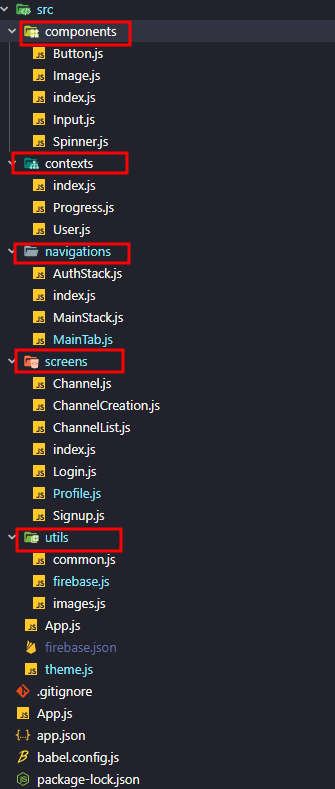
프로젝트 구조
- components : 컴포넌트 파일 관리
- contexts: Context API 파일 관리
- navigations : 내비게이션 파일 관리
- screens : 화면 파일 관리
- utils : 프로젝트에서 이용할 기타 기능 관리
2. 파이어베이스
파이어베이스는 인증(Authentication), 데이터베이스(Database) 등 다양한 기능을 제공하는 개발 플랫폼. 파이어베이스를 이용하면 대부분 서비스에서 필요한 서버, 데이터베이스를 직접 구축하지 않아도 개발이 가능하다는 장점이 있다.
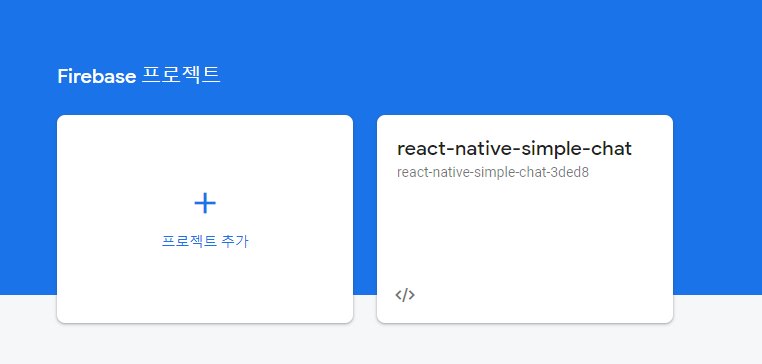
먼저 파이어베이스 콘솔에서 프로젝트를 생성해 준다.
Firebase
Firebase는 고품질 앱을 빠르게 개발하고 비즈니스를 성장시키는 데 도움이 되는 Google의 모바일 플랫폼입니다.
firebase.google.com
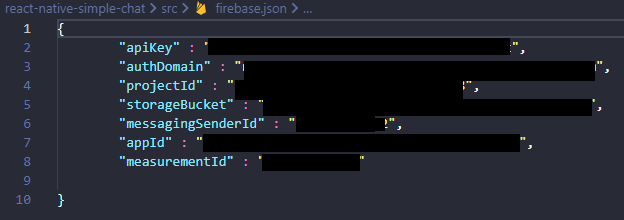
파이어베이스 프로젝트 설정 / 일반 / 내 앱에서 파이어베이스 설정값을 확인 후
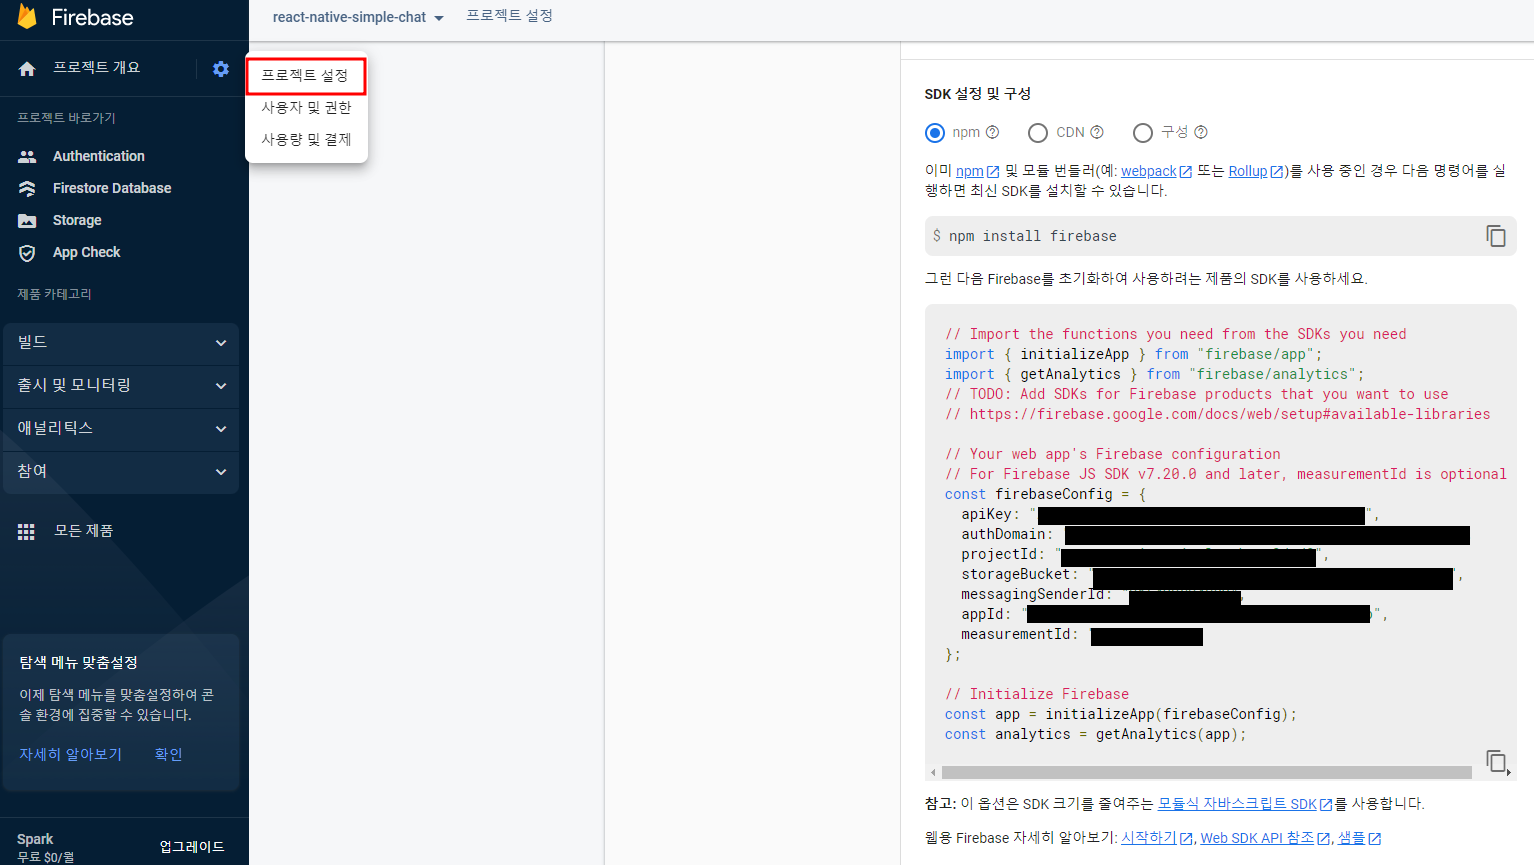
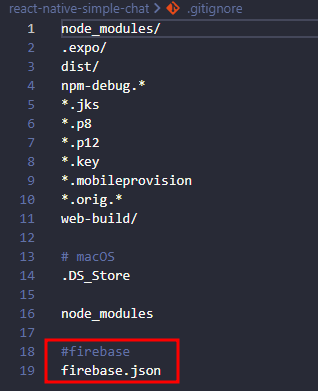
firebase.json 파일에 생성 후 노출되지 않도록 .gitignore 파일에 추가한다.
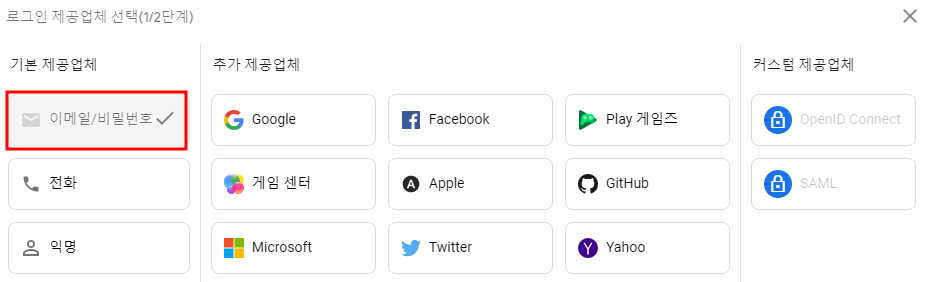
2-1. 인증
파이어베이스에서 제공하는 다양한 인증 기능 중 '이메일/비밀번호' 선택
2-2. 프로젝트와 연동
리액트 네이티브에서 파이어베이스를 사용하기 위해 라이브러리를 설치해 준다.
expo install firebase //파이어베이스 라이브러리 설치그런데 여기서 내가 고생했던 부분... 위의 명령어로 설치 시 가장 최근 버전이 설치되는데, 책에서 사용하는 버전과 달라서 문법이 바뀌고 여러 가지 에러를 겪었다😢 이 방법이 맞는지 모르겠지만 버전을 낮추니 에러를 잡는 것은 해결했다. 파이어베이스 버전때문에 약 이틀 간 에러로 고생함 ㅠㅠㅠ
npm uninstall firebase	//삭제
npm install firebase@9.6.11	//낮은 버전으로 설치
3. 로고 변경
파이어베이스 storage에 아이콘, 배경화면 이미지 업로드 후 파일명을 클릭하면 링크가 나온다.
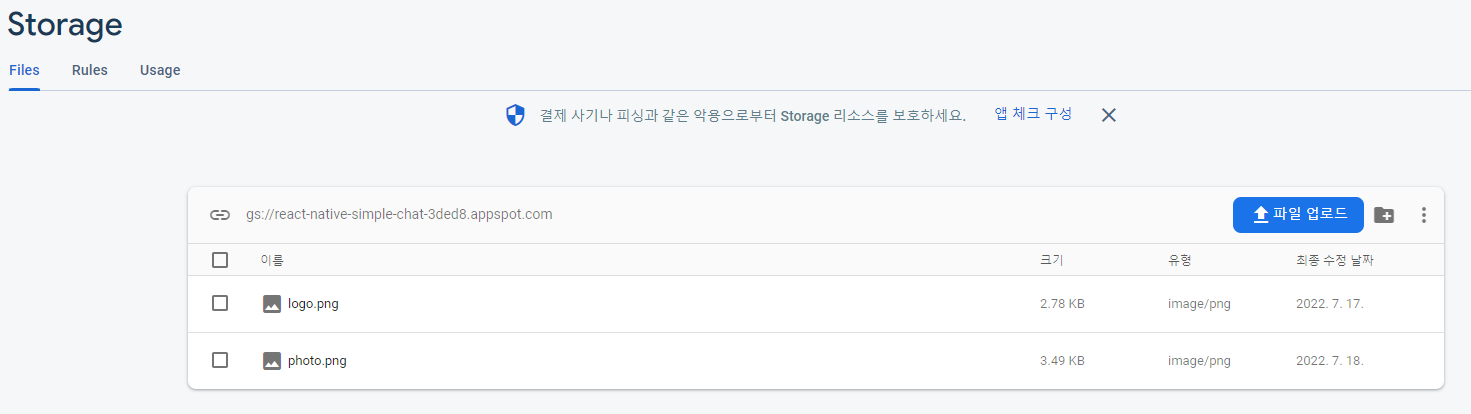
image.js 파일 생성 후 각 이미지 링크를 가져와서 사용한다.
const prefix =
    "https://firebasestorage.googleapis.com/v0/b/react-native-simple-chat-3ded8.appspot.com/o";

export const images = {
    logo: `${prefix}/logo.png?alt=media`,
    photo: `${prefix}/photo.png?alt=media`,
};
변경 완료
4. 로그인
먼저 프로젝트에서 사용할 색들을 theme.js에 따로 정의해 주었다.
const colors = {
    white: '#ffffff',
    black: '#000000',
    grey_0: '#d5d5d5',
    grey_1: '#a6a6a6',
    red: '#e84118',
    blue: '#3679fe',
};

export const theme= {
    background: colors.white,
    text: colors.black,
    errorText: colors.red,

    //Image Component
    imageBackground: colors.grey_0,
    imageButtonBackground: colors.grey_1,
    imageButtonIcon: colors.white,

    //Input Component
    label: colors.grey_1,
    inputPlaceholder: colors.grey_1,
    inputBorder: colors.grey_1,

    //Button Component
    buttonBackground: colors.blue,
    buttonTitle: colors.white,
    buttonUnfilledTitle: colors.blue,
    bottonLogout: colors.red,

     // Navigation
    headerTintColor: colors.black,
    tabActiveColor: colors.blue,
    tabInactiveColor: colors.grey_1,

    //Spinner
    spinnerBackground: colors.black,
    spinnerIndicator: colors.white,
};
Input 컴포넌트 작성
- 라벨을 TextInput 컴포넌트 위에 랜더링, 포커스 여부에 따라 스타일이 변경됨.
- secureTextEntry : 문자를 감추는 기능, 비밀번호 입력에 많이 사용됨.
const Input = forwardRef (
    ({
    label,
    value,
    onChangeText,
    onSubmitEditing,
    onBlur,
    placeholder,
    isPassword,
    returnKeyType,
    maxLength,
},
    ref) => {
    const [isFocused, setIsFocused] = useState(false);

    return (
        <Container>
            <Label isFocused={isFocused}>{label}</Label>
            <StyledTextInput
                ref={ref}
                isFocused={isFocused}
                value={value}
                onChangeText={onChangeText}
                onSubmitEditing={onSubmitEditing}
                onFocus={()=>setIsFocused(true)}
                onBlue={()=>{
                    setIsFocused(false);
                    onBlur()
                }}
                placeholder={placeholder}
                secureTextEntry={isPassword}
                returnKeyType={returnKeyType}
                maxLength={maxLength}
                autoCapitalize="none"
                autoCorrect={false}
                textContentType="none"  //iOS only
                underlineColorAndroid="transparent" //Android only
            />
        </Container>
    );
}
);

Input.defaultProps = {
    onBlue: () => {},
};

Input.propTypes = {
    label: PropTypes.string.isRequired,
    value: PropTypes.string.isRequired,
    onChangeText: PropTypes.func.isRequired,
    onBlue: PropTypes.func,
    placeholder: PropTypes.string,
    isPassword: PropTypes.bool,
    returnKeyType: PropTypes.oneOf(['done','next']),
    maxLength: PropTypes.number,
};

export default Input;
Button 컴포넌트 작성
const Button = ({containerStyle, title, onPress, isFilled, disabled}) => {
    return (
        <Container
            styled={containerStyle}
            onPress={onPress}
            isFilled={isFilled}
            disabled={disabled}
            >
            <Title isFilled={isFilled}>{title}</Title>
        </Container>
    );
};

Button.defaultProps = {
    isFilled: true,
};

Button.propTypes = {
    containerStyle: PropTypes.object,
    title: PropTypes.string,
    onPress: PropTypes.func.isRequired,
    isFilled: PropTypes.bool,
    disabled: PropTypes.bool
};

export default Button;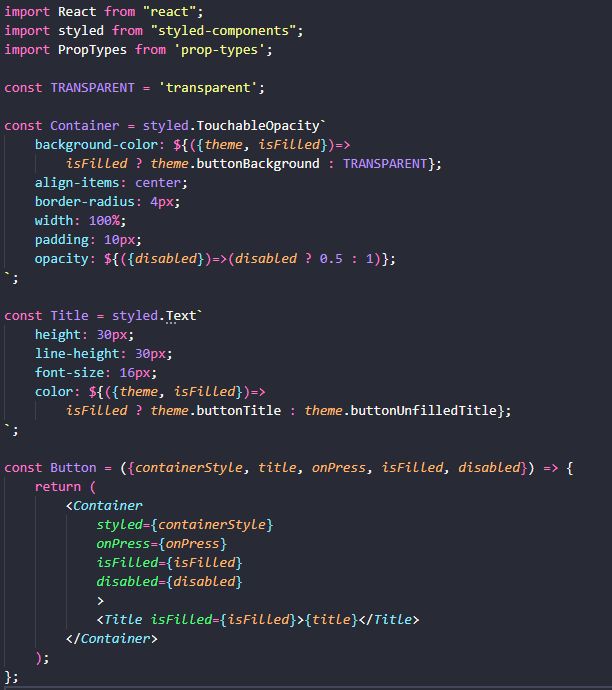
이메일과 비밀번호가 입력되지 않으면 Button 컴포넌트가 동작하지 않도록 수정
opacity: ${({disabled})=>(disabled ? 0.5 : 1)};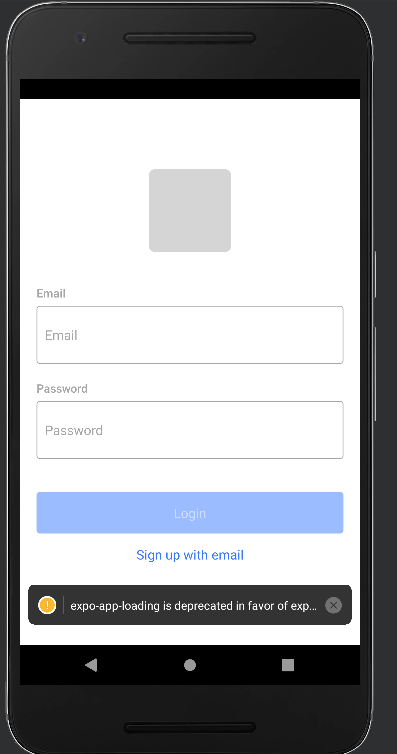
로그인 UI Login 컴포넌트
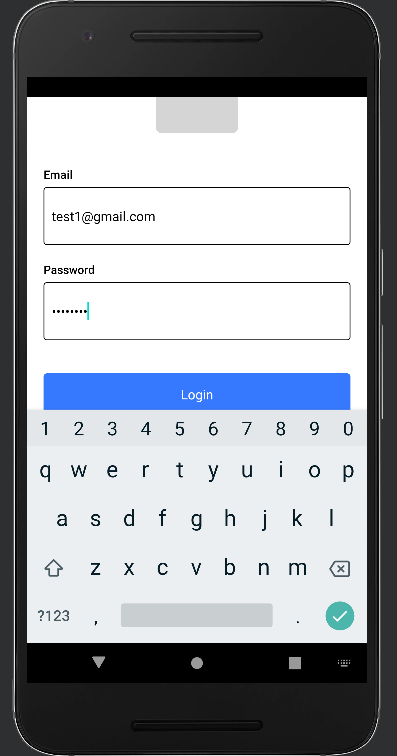
- 입력되는 이메일, 비밀번호를 관리할 email, password를 useState 함수로 생성 후 각각 이메일, 비밀번호를 입력받는 Input 컴포넌트의 value로 지정함.
- 비밀번호 입력 컴포넌트는 입력되는 값이 보이지 않도록 isPassword 속성 추가
- 이메일 입력 Input 컴포넌트의 returnKeyType을 next로 설정, 비밀번호 Input 컴포넌트는 done으로 설정.
- useRef : 이메일 입력 컴포넌트에서 키보드의 next 버튼 클릭 시 비밀번호 입력 컴포넌트로 포커스 이동
- KeyboardAwareScrollView : 입력 도중 다른 영역 터치했을 때 키보드가 사라짐, 포커스를 얻은 TextInput 컴포넌트의 위치에 맞춰 스크롤 이동
return(
//활성화된 키보드를 닫음.
// <TouchableWithoutFeedback onPress={Keyboard.didmiss}>
<KeyboardAwareScrollView
contentContainerStyle={{ flex: 1 }}
extraScrollHeight={20}>
<Container insets={insets}>
{/* <Text style={{fontSize: 30}}>Login Screen</Text> */}
<Image url={images.logo} imageStyle={{borderRadius: 8}}/>
<Input
label="Email"
value={email}
/*onChangeText={text=>setEmail(text)}*/
onChangeText={_handleEmailChange}
onSubmitEditing={()=>passwordRef.current.focus()}
placeholder="Email"
returnKeyType="next"
/>
<Input
ref={passwordRef}
label="Password"
value={password}
/*ChangeText={text=>setPassword(text)}*/
onChangeText={_handlePasswordChange}
/*onSubmitEditing={()=>{}}*/
onSubmitEditing={_handleLoginButtonPress}
placeholder="Password"
returnKeyType="done"
isPassword
/>
{/* <Button title="Signup" onPress={()=>navigation.navigate('Signup')} /> */}
<ErrorText>{errorMessage}</ErrorText>
<Button title="Login" onPress={_handleLoginButtonPress} disabled={disabled} />
<Button
title="Sign up with email"
onPress={()=>navigation.navigate('Signup')}
isFilled={false}
/>
</Container>
{/* </TouchableWithoutFeedback> */}
</KeyboardAwareScrollView>
);
};
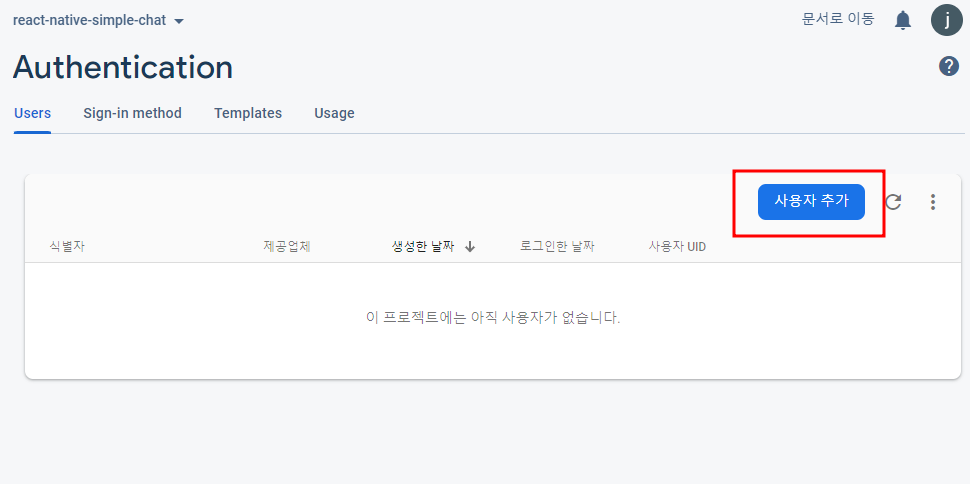
export default Login;이제 로그인에 사용할 사용자를 파이어베이스에 추가해 준다.
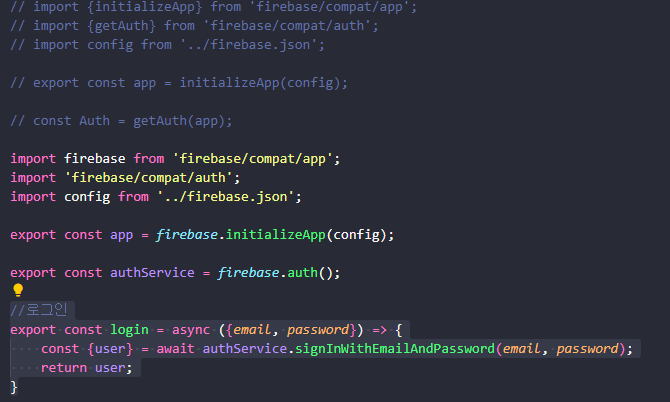
로그인 함수 구현
- signInWithEmailAndPassword : 이메일과 비밀번호를 이용해서 인증받는 함수
//로그인
export const login = async ({email, password}) => {
    const {user} = await authService.signInWithEmailAndPassword(email, password);
    return user;
}
이것도 파이어베이스 버전으로 고생을 많이했다. ㅠㅠ 책에서 나오는 문법대로 하면 에러가 발생하고 v9 이상부터 새로 바뀐 문법을 적용해 주어야 한다.
로그인 화면 수정
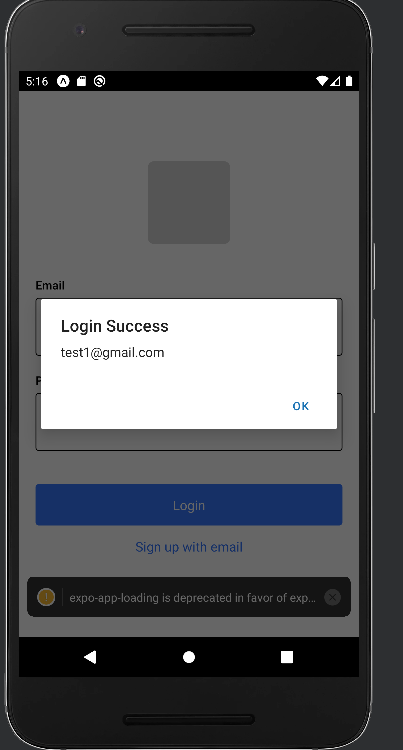
const _handleLoginButtonPress = async () => {
try{
const user = await login({email, password});
Alert.alert('Login Success', user.email);
//인증되면 UserContext의 user를 수정하도록
//dispatch(user);
}catch(e){
Alert.alert('Login Error', e.message);
}
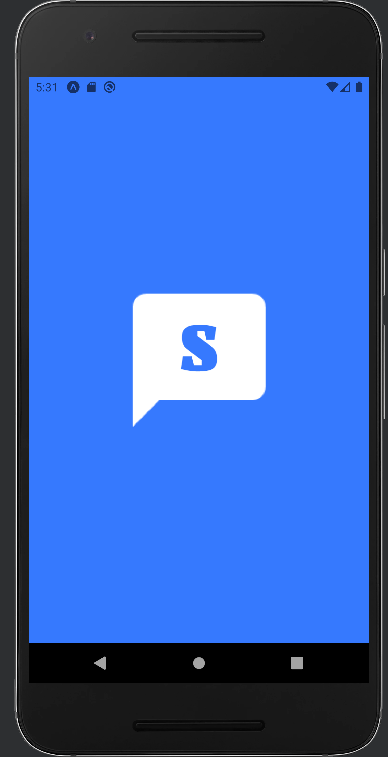
};실행 화면
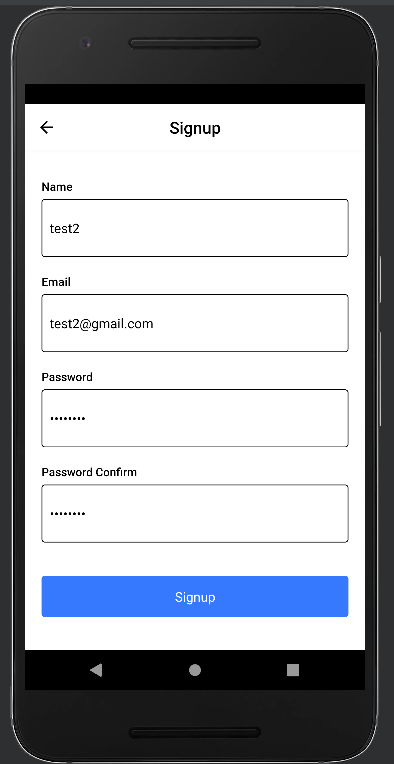
5. 회원가입
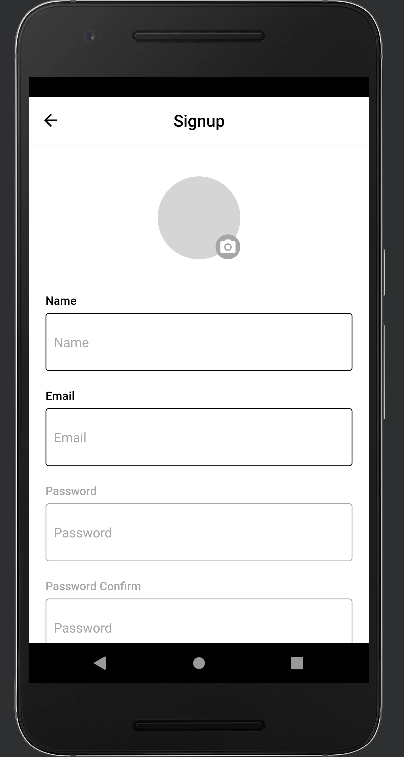
입력받아야 하는 내용이 많아졌을 뿐, 로그인 화면과 거의 유사하다.
 return (
        <KeyboardAwareScrollView
            extraScrollHeight={20}
        >
        <Container>
            <Image rounded url={photoUrl} showButton onChangeImage={url => setPhotoUrl(url)}/>
            <Input
                label="Name"
                value={name}
                onChangeText={text=>setName(text)}
                onSubmitEditing={()=>{
                    setName(name.trim());
                    emailRef.current.focus();
                }}
                onBlue={()=>setName(name.trim())}
                placeholder="Name"
                returnKeyType="next"
            />
            <Input
                ref={emailRef}
                label="Email"
                value={email}
                onChangeText={text=>setEmail(removeWhitespace(text))}
                onSubmitEditing={()=>passwordRef.current.focus()}
                placeholder="Email"
                returnKeyType="next"
            />
            <Input
                ref={passwordRef}
                label="Password"
                value={password}
                onChangeText={text=>setPassword(removeWhitespace(text))}
                onSubmitEditing={()=>passwordConfirmRef.current.focus()}
                placeholder="Password"
                returnKeyType="done"
                isPassword
            />
            <Input
                ref={passwordConfirmRef}
                label="Password Confirm"
                value={passwordConfirm}
                onChangeText={text=>setPasswordConfirm(removeWhitespace(text))}
                onSubmitEditing={_handleSignupButtonPress}
                placeholder="Password"
                returnKeyType="done"
                isPassword
            />
            <ErrorText>{errorMessage}</ErrorText>
            <Button
                title="Signup"
                onPress={_handleSignupButtonPress}
                disabled={disabled}
            />
            {/* <Text style={{ fontSize: 30 }}>Signup Screen</Text> */}
        </Container>
        </KeyboardAwareScrollView>
    );
};

export default Signup;
useEffect를 이용해 관련된 값이 변할 때마다 오류 메시지가 렌더링되도록 유효성 검사 추가
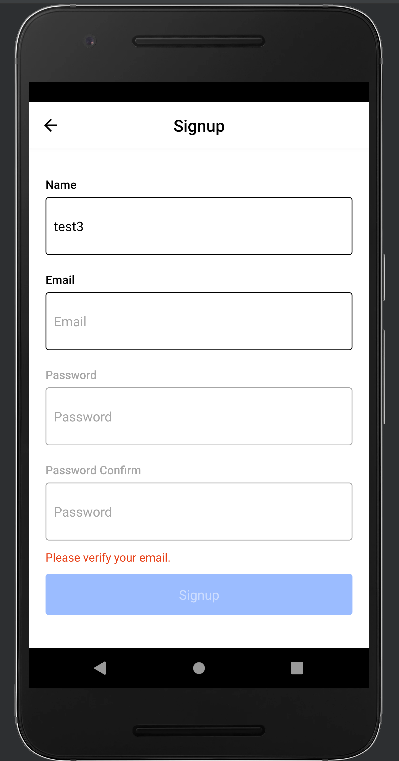
사진 입력받기
import React, {useEffect} from "react";
import * as ImagePicker from 'expo-image-picker';
import * as Permission from 'expo-permissions';
import styled from "styled-components";
import PropTypes from 'prop-types';
import { Alert, Platform } from "react-native";
import {MaterialIcons} from '@expo/vector-icons';

...

...

const Image = ({ url, imageStyle, rounded, showButton, onChangeImage }) => {
    useEffect(()=>{
        (async ()=>{
            try{
                if(Platform.OS !== 'web'){
                    const{
                        status,
                    } = await ImagePicker.requestMediaLibraryPermissionsAsync();
                    if (status !== 'granted'){
                        Alert.alert(
                            'Photo Permission',
                            'Please turn on the camera roll permissions.'
                        );
                    }
                }
            }catch(e){
                Alert.alert('Photo Permission Error', e.message);
            }
        })();
    }, []);

    const _handleEditButton = async () => {
        try{
            const result = await ImagePicker.launchImageLibraryAsync({
                mediaTypes : ImagePicker.MediaTypeOptions.Images,
                allowsEditing: true,
                aspect: [1,1],
                quality: 1,
            });

            if(!result.cancelled){
                onChangeImage(result.uri);
            }
        }catch(e){
            Alert.alert('Photo Error', e.message);
        }
    };

    return(
        <Container>
            <StyledImage source={{ url: url }} style={imageStyle} rounded={rounded} />
            {showButton && <PhotoButton onPress={_handleEditButton} />}
        </Container>
    );
};

Image.defaultProps = {
    ...
}

Image.prototype = {
   ...
};

export default Image;
expo-image-picker 라이브러리 설치를 통해 버튼 클릭 시 사진첩에 접근하도록 구현

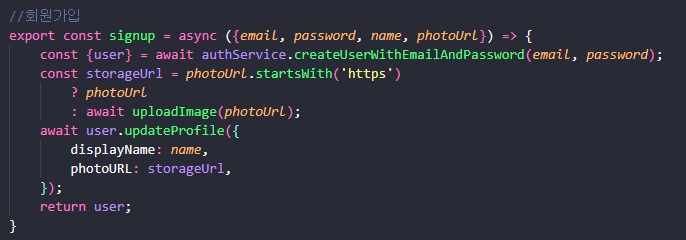
회원가입 함수 구현
- createUserWithEmailAndPassword : 파이어베이스에서 제공하는 함수 중 이메일과 비밀번호를 이용해 사용자를 생성하는 함수
//회원가입
export const signup = async ({email, password, name, photoUrl}) => {
    const {user} = await authService.createUserWithEmailAndPassword(email, password);
    const storageUrl = photoUrl.startsWith('https')
        ? photoUrl
        : await uploadImage(photoUrl);
    await user.updateProfile({
        displayName: name,
        photoURL: storageUrl,
    });
    return user;
}
이 부분 역시 파이어베이스 v9 문법 차이로 고생을 했던...
회원가입 화면 수정
const _handleSignupButtonPress = async () => {
        try{
            const user = await signup({email, password, name, photoUrl});
            console.log(user);
            //Alert.alert('Signup Success', user.email);
        }catch(e){
            Alert.alert('Signup Error', e.message);
        }
    };
회원가입 완료
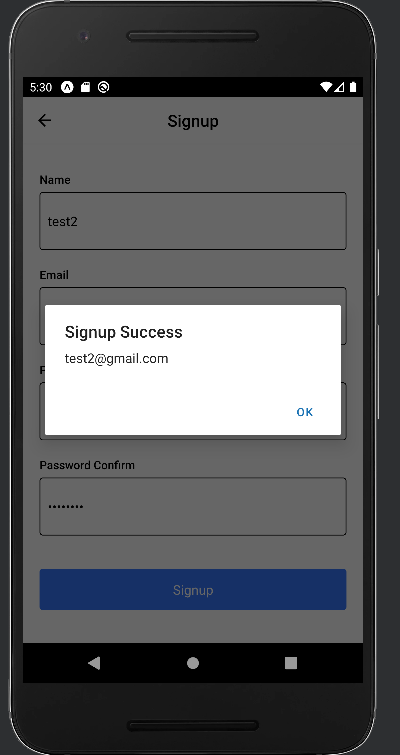
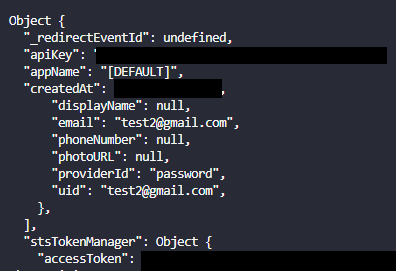
signup 함수에서 반환되는 user 객체를 보면 uid(사용자마자 갖고 있는 유일한 키값)로 사용자를 식별하고 있다.
=> 파이어베이스에서 사용되는 사용자 생성 함수는 사용자의 이름을 이용하지 않고 이메일, 비밀번호만으로 사용자 생성이 가능하다.